Twisted cord is remarkably easy and idiot-proof to make. I learned to make it as a very little girl, watching my mom make some to trim some baby sacques (little jackets) she was making for my younger sister. It's a fascinating process and makes a very professional-looking string or cord for various purposes, and you need no special equipment whatsoever.
First of all, what is twisted cord? What does it look like? Here's a little dab I just pulled out of my knitting caddy:
See? You can already imagine things you could use this for, I'm sure. Want to try it yourself? Here is my hokey tutorial to show you how. You can practice with some leftover yarn that is too short to make anything with.
First, what you'll need is yarn or string, something to tie it to (or use a helper--it really makes fast work if there are two of you), and (if you like) something to make twisting easy. I've got a little dowel rod here, but usually I just grab a short pencil or whatever is handy.
For this demonstration I'm going solo. I "measured" out a little over a yard and a half of worsted weight yarn. Don't sweat this--no need to be exact. (Using a single strand will make a thinner, finer cord than the pink and white ones in the previous photo. If you want a thicker cord, just use double up or triple up your strands of yarn.)
If you have a helper, have him/her hold the other end. Make sure to get a good grip on the string, though! Better yet, tie his/hers to a twisting rod, too. Your helper can either twist along with you or just stand there hanging on to the end of the yarn. It's faster if you both twist.
Now the idea of the whole thing is to get a lot of tension in the strand(s). So stretch out the yarn to its full length, and start twisting it in one direction. Using the dowel rod makes it easy to just twirl and twirl.
I'm twisting the rod (clockwise, in my case, but it doesn't matter which way) while keeping the yarn fairly taut. It's winding up like a spring.
I recommend giving it a few more twists to tighten it up even more, but you can vary the tension depending on what kind of effect you want to achieve. It's better to have too much tension rather than not enough. Don't worry if it starts to look like this when you relax the tautness. Just back up and pull the string out straight again.
Now comes the fun part. Putting a finger in the approximate middle of your twisted string, fold it in half. If you have a helper, it's a bit easier, but you can do it by yourself. After all, I did it alone and took photos, too!
Let go!!!!!
The cord goes nuts, twisting itself up in all sorts of fantastic ways. Don't panic--this is normal. Just gently pull it out straight, and it will reposition itself properly.
See? Cool, huh?
Now carefully disengage the string from whatever you've tied it to, keeping hold of the end. Tie a knot, and trim off the leftover bits.
You don't have to, but I like to tie the other end (where the string was folded in half on itself) as well.
This finished cord now measures about 22", so you can see you need to start with a much longer piece than you want to end up with. Experiment a bit; you'll get the hang of it. You can play with thicker cords, multi-colored cords, and with different types of string or yarn.
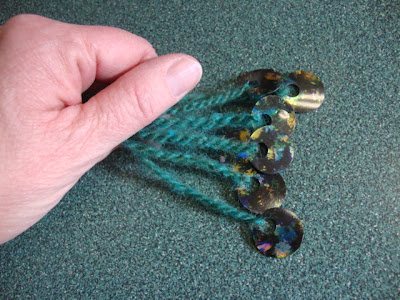
Here are some I've made with iridescent bangles on them. They're very short strands, and I'm going to try and make some kind of embellishment for an oddball hat I've just finished. I haven't quite figured out what exactly I'm going to do with them, but I'll show you when I do.
Hope this makes sense! Feel free to ask questions if I've confused you. Have fun!


No comments :
Post a Comment